To start to encode your contents, you need to create a Project on BlendVision Web Console first. BlendVision LOOM provides two project types for selection:
- Encoding only
- Streaming: Encoding + CDN output endpoint

After selecting your project type, you will be navigated to the project setting page for further project settings. Please note that you will not be able to change your Project Type once the project creation is completed.
Four categories of project-related information below need to be defined:
- General
- A section for you to name your project and provide a project description.

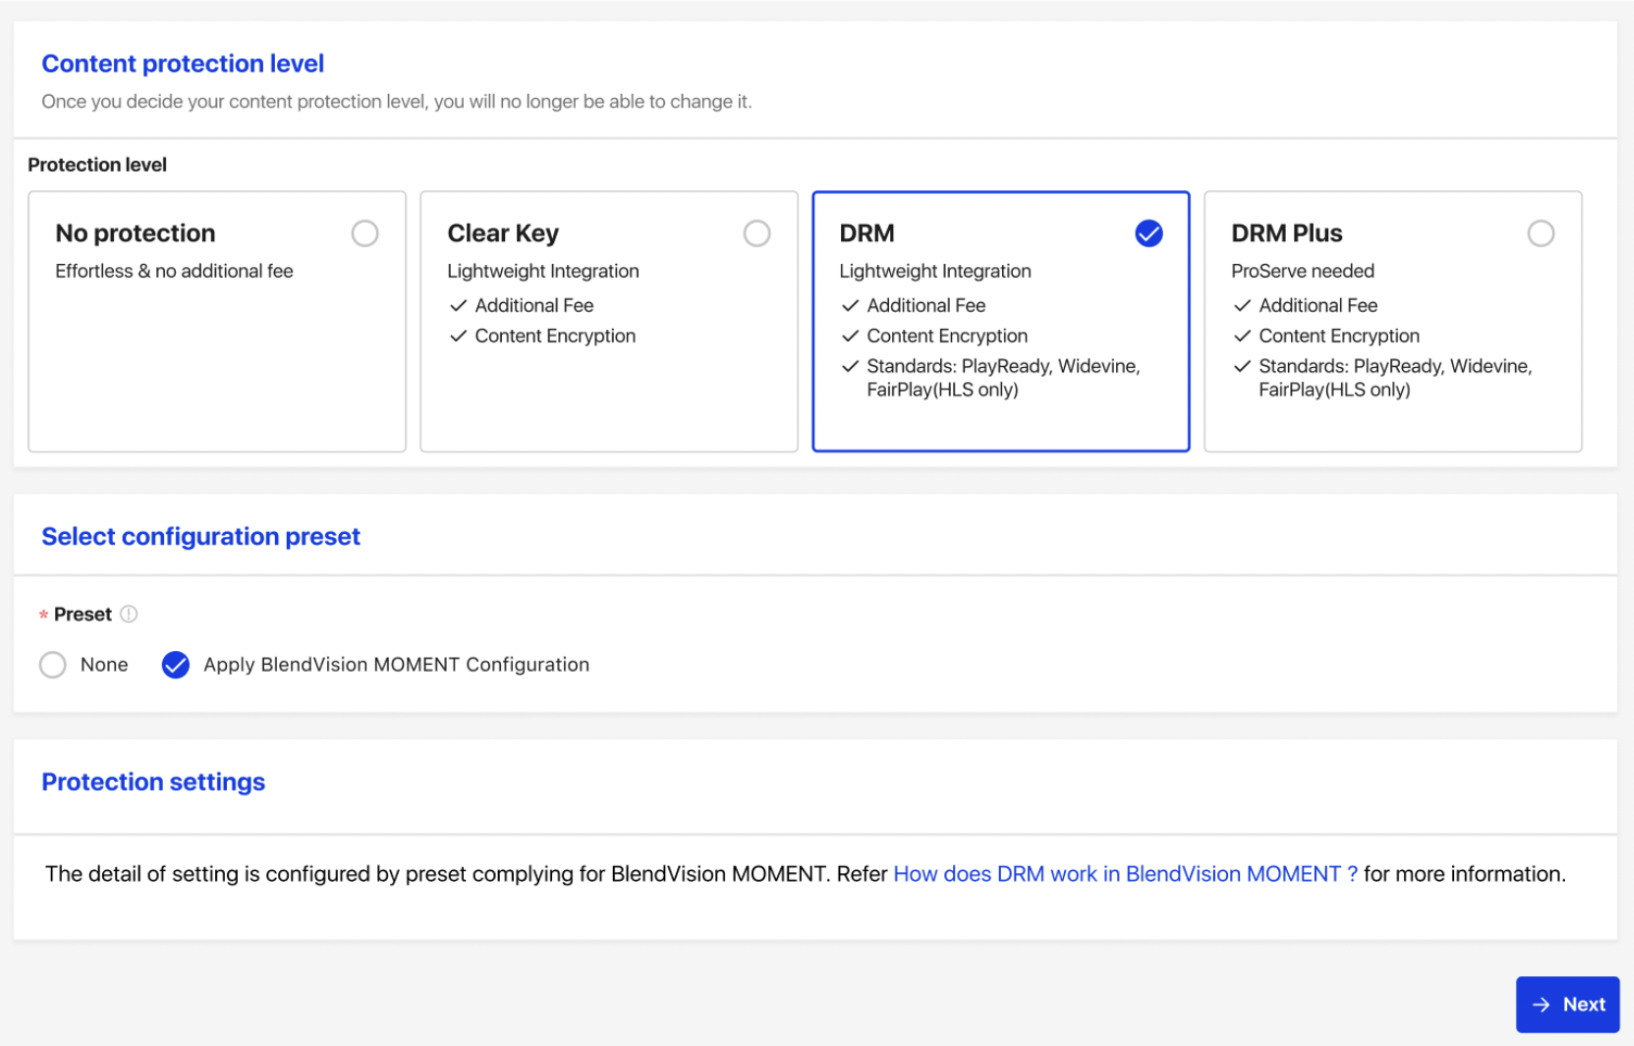
- Content Protection
- A section to define what kind of protection level your encoded video needs. Whether it is DRM, Clear Key, or No Protection.
- If you select DRM or DRM plus as your content protection level, you can further define offline playback duration and digital/analog output protection setting.
- Please note that you will not be able to change your Protection Level setting once you created the project.
- Apply DRM preset configuration: once you select DRM protection, you will notice there are two options on the block.
- None: Fill in the blanks to complete encryption settings.
- Apply BlendVision MOMENT Configuration: For users directed from BlendVision MOMENT, if you want to upload a video and broadcast it utilizing the Simulive in playback mode function of MOMENT, please select to adopt the DRM settings prepared by MOMENT.

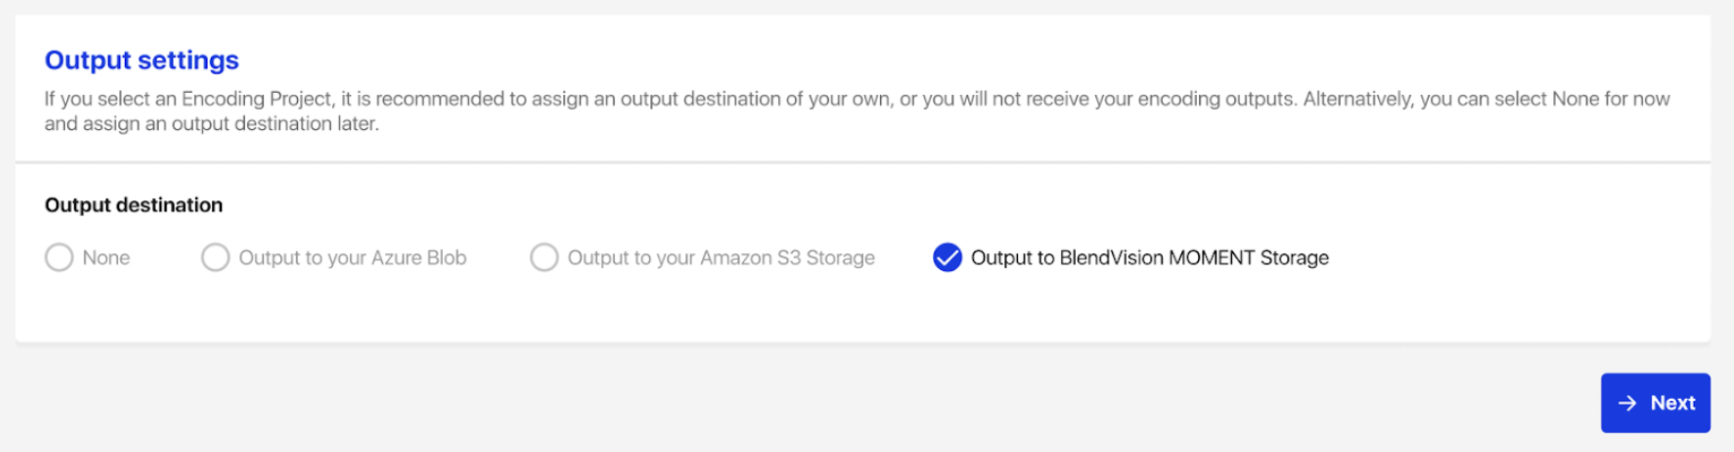
- Output and Upload Information
- A section to define where to store your encoded outcome and to check your source upload endpoints.
- Currently, BlendVision Encoder supports both Azure Blob and AWS S3 as your encoding output destination.
- Please note that if you select “None” as your output destination, you will not be able to access your final encoding outputs. However, if your project type is streaming, you can still access the encoded content via CDN.
- For users directed from BlendVision MOMENT, please select "Output to BlendVision MOMENT storage". This setting will automatically transfer your encoded result to the storage designated by MOMENT so you can utilize the results as the source of the Simulive playback mode function, or the VOD to play after your live event.
- Notification setting
- A section to define how you want to be notified of the progress of your encoding job.
- BlendVision Encoder currently provides two approaches for status tracking: whether it is by Email or by Webhooks.
- Under the Email list, you can manage your email notification recipients and define if you want to keep track of all encoding events or only start/end events.
- Under Webhook settings, you can add multiple Webhook URLs and define how you want to get notified by each Webhook.

By finishing the above, you are ready to start creating your encoding jobs.