Introduction
There are several approaches to submit a job to BlendVision, which you can find here. In this page, you will see how to use Microsoft Azure Storage Explorer to upload your source file to specific endpoint, which will trigger an encoding job in different queue types and encoding profiles.
By proceeding the following procedures, you will need an account and a key, which you could request from your BlendVision account manager through email, or sign up to BlendVision Console.
- Account Name
- Account Key
- Input ID
- Input Endpoint
- ProfileSet ID
Steps
- Download and launch Microsoft Azure storage explorer
- Connect
- Create folder - to decide Encoding queue and Encoding Profile Set
- Upload your file(s)
2. Connect
Connect to your designated storage account on Azure blob
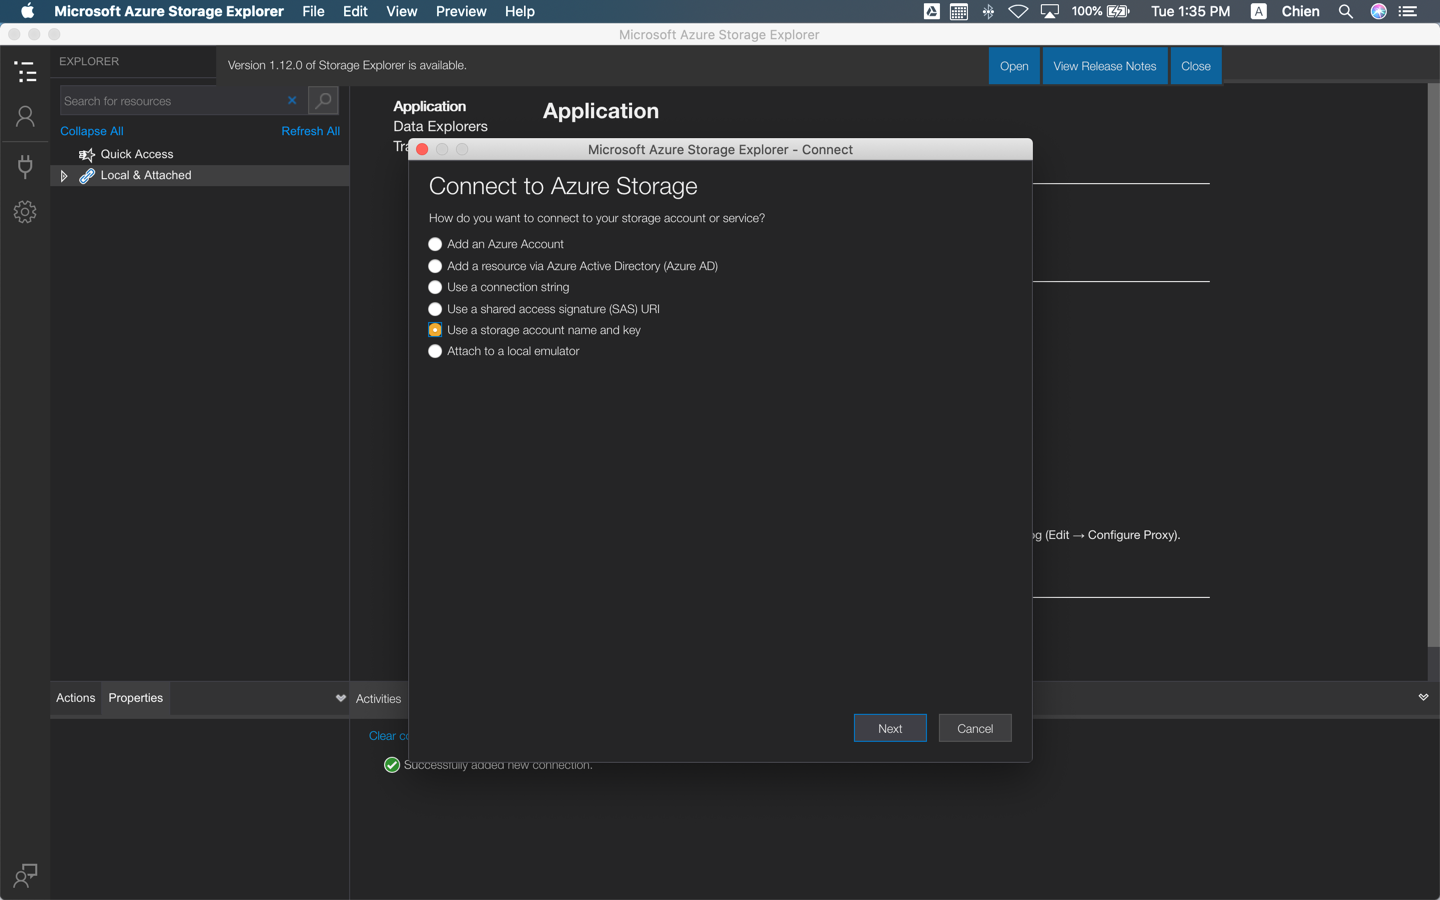
2.1 Choose "Use a storage account name and key" and click "Next"
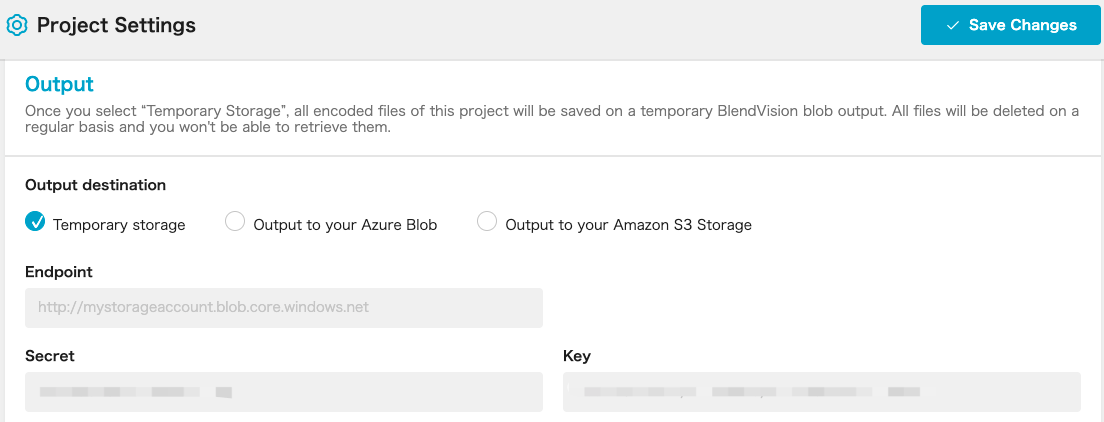
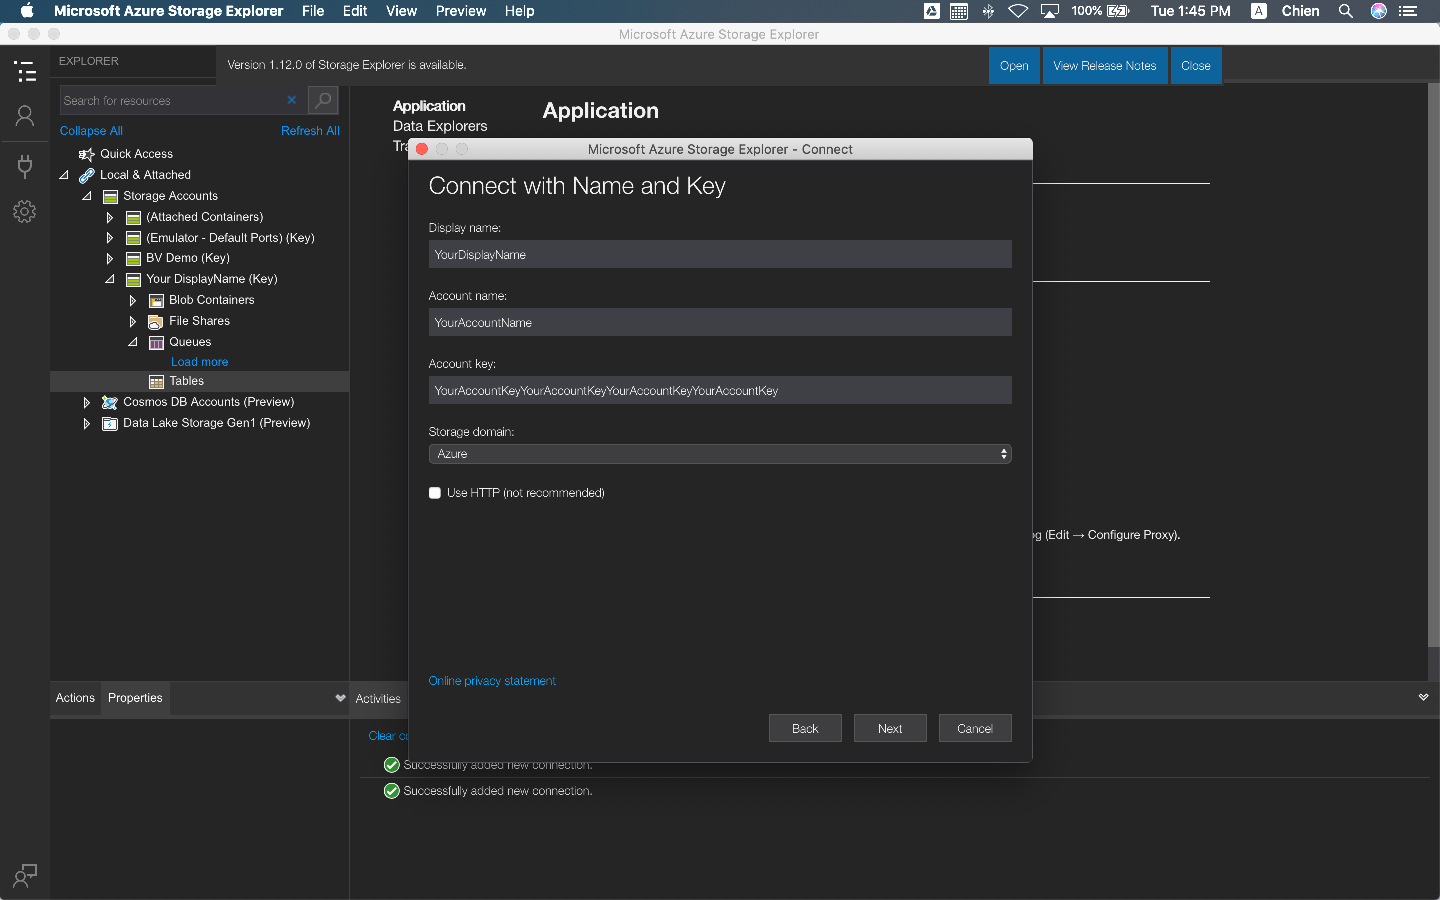
2.2 Enter your "Display name" (Any preferred name), "Account name" and "Account key"
- You can find your "Account name" and "Account key" on BlendVision Console
- Select one project you'd like to upload to > Project Settings page: Inputs section
2.3 Review Connection Summary and click "Connect"
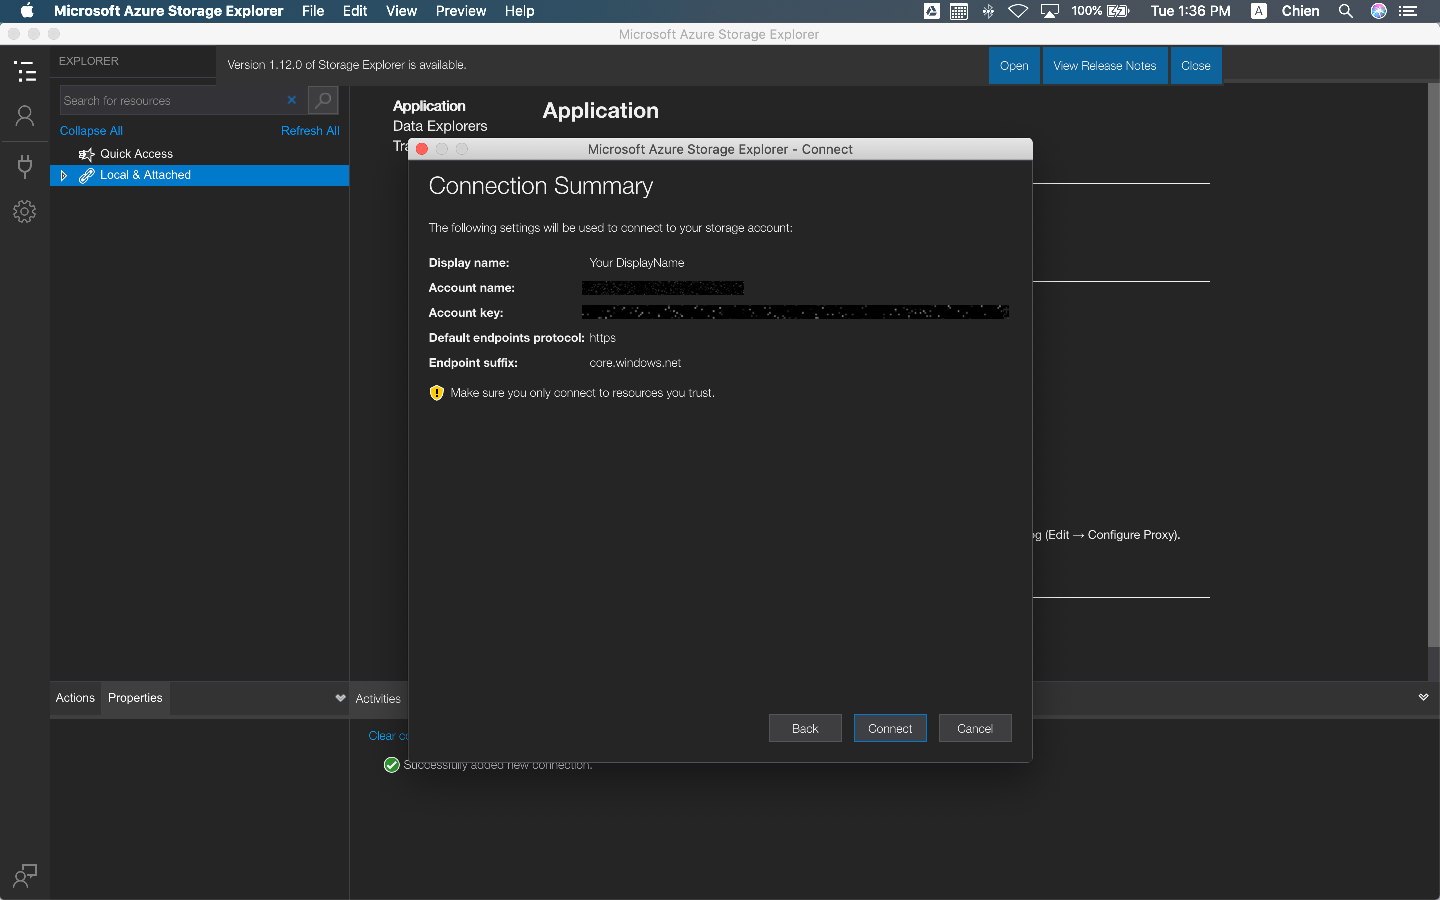
2.4 Successfully added new connection.
- Find target containers under Blob Containers folder and click to open container folder, then the connection is successful
3. Select Folder
To decide to upload your source file to which Encoding queue and apply to Encoding Profile Set. For more details you can find here.
- There are 2 encoding queues - Smart Queue and Priority Queue.
- There are two types of Encoding Profile Set - Several default sets and your customized set.
3.1 Create "sq" (Smart Queue) or "pq" (Priority Queue) folder
*Please note that, encoding through Priority queue (almost zero lead time) is 2 times expensive than Smart Queue. Details
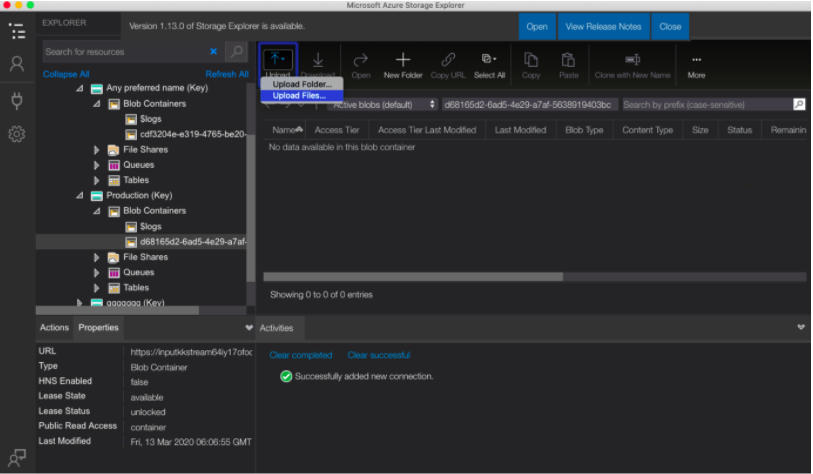
- Click "Upload" and press "Upload Files"
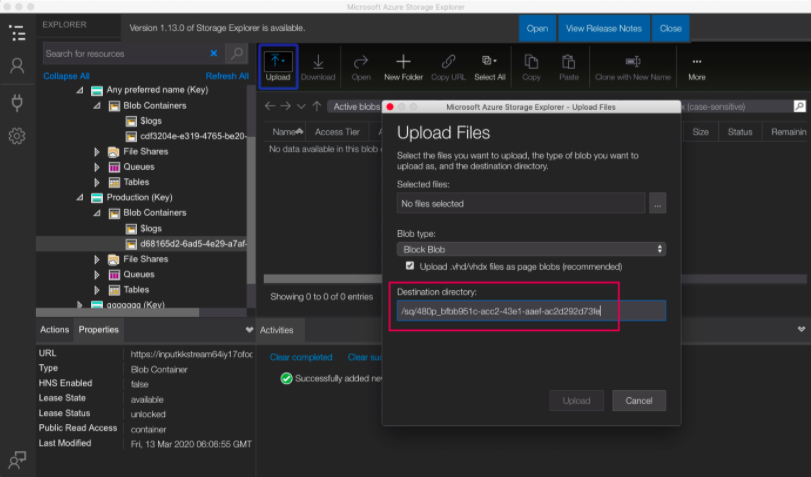
3.2 Define Destination directory
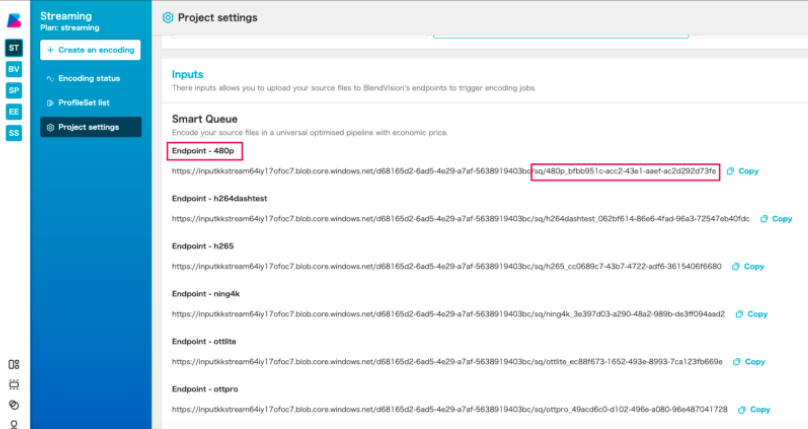
- Choose corresponding "Input Endpoint" for sq or pq at project’s "Project settings" page i.e., Queue Type: Smart Queue, ProfileSet ID: Endpoint - 480p, copy the URL (start from /sq) as marked
- Fill the copied URL in Destination directory
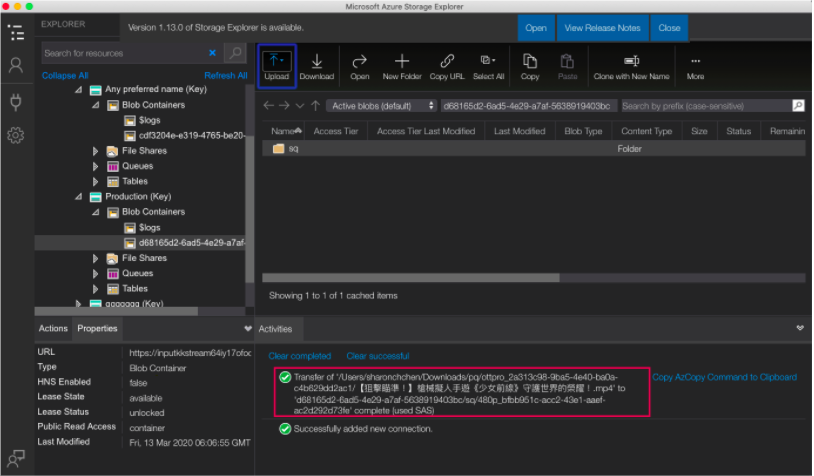
3.3 Upload your file(s)
- Select the files you want to encode and press "Upload"
4. Check Encoding Status
Once your upload is completed, our system will ingest your source file and trigger an encoding job. You can view your job status, encoded video, and playback url by BlendVision Console or API.
-
Encoding only
On BlendVision Console, you can view your job status in project’s "Encoding status" page and find your encoded video under your project’s Output destination in "Project settings" page.
-
Encoding + Streaming (CDN)
On BlendVision Console, you can view your job status in project’s "Encoding status" page and find your encoded video under your project’s Output destination in "Project settings" page under Streaming Project.
Also, you can find Playback URL in CDN section in project’s "Encoding status" page.
*Temporary storage is only used for the users who haven’t provided their output destination yet, and the video will only be stored 7 days in Beta version. If you would like to download the video, please Contact us. Please note that our policy might be changed in the future.