Introduction
There are serval approaches to submit a job to BlendVision, which you can find here. In this page, you will see how to use Azure CLI to upload your source file to specific endpoint, which will trigger an encoding job in different queue type and encoding profile.
By proceeding following procedure, you will need the account and the key, which you could request from your BlendVision account manager through email, or sign up to BlendVision Console.
- Account name
- Account key
- Input id
- Input endpoint
- ProfileSet ID
Steps
- Download and install Azure CLI
- Upload your file(s) by command
2. Reference:
2.1 Uploading Methods
- Uploading one file at one time:
- Batch uploading at one time:
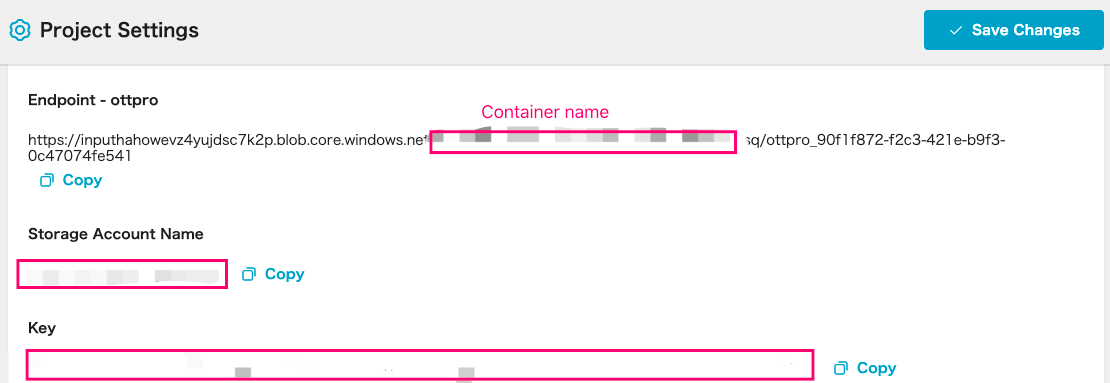
2.2 Find the following info from project setting page "Account name", "Container name" and "Account key"
- You can find your "Account name", "Container name" , "Account key", "Endpoint Path" on BlendVision Console
- Select one project you'd like to upload to > Project Settings page: Inputs section
2.3 Command Example
For example endpoint of ottpro
https://<account_name>.blob.core.windows/net/<container name>/<endpoint path>
- account name = inputxxxxx
- container name = cfe33c3c-xxxxx-xxxxx-xxxxx-xxxx
- endpoint path = sq/ottpro_bfde89c8-fce6-4f15-a0dd-52e1783c4f56/video.mp4
az storage blob upload \
--account-name “inputxxxxx” \
--container-name “cfe33c3c-xxxxx-xxxxx-xxxxx-xxxx” \
--name "sq/ottpro_bfde89c8-fce6-4f15-a0dd-52e1783c4f56/test.mp4" \
--file “{local/path/source.mp4}” \
--auth-mode key \
--account-key “{account_key}”